
How to score bread: patterns and tips

9 min read time
18 August 2025
Scoring bread dough is an artistic technique that lets you express your culinary style, create signature designs and better control your loaf’s rise in the oven. Whether you’re creating a rustic sourdough boule or aromatic sandwich bread, use this guide to learn more about the scoring process and discover the bread-making tools you need to get started.
What does scoring bread do?
For some types of loaves, scoring helps a loaf expand to its fullest while controlling the direction of the expansion, helping you avoid a loaf that breaks and cracks unpredictably during baking. This technique can even help coax under-proofed dough into expanding more fully.
Is scoring bread necessary?
Not all bread requires scoring, but the technique typically serves both aesthetic and practical purposes. Scoring helps bread expand more evenly in the oven by relieving resistance and helping to prevent erratic cracks in the crust, but some instances call for skipping this step.
In cases where bread is significantly over-proofed, for instance, scoring can cause risen bread dough to “deflate” and compromise its structural integrity. Breads made with a high proportion of liquid (called “high hydration” breads) are typically too wet to hold any scoring lines. And breads baked at lower temperatures also generally don’t need scoring.
What are the different bread scoring patterns?
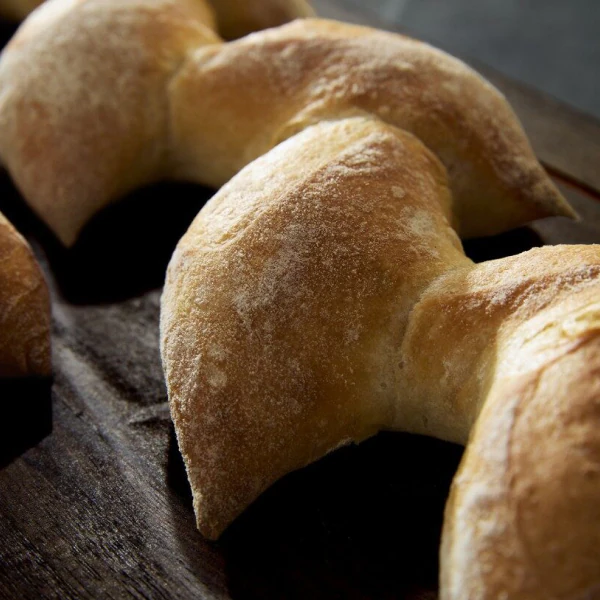
The best way to score bread dough typically depends on the shape of the loaf you’re creating. A basic cross or square-shaped scoring is effective for round loaves like boules, while longer loaves like baguettes and batards do well with small, diagonal slashes.
A simple hashtag (number sign) pattern is a great choice if you’re a beginner experimenting with this technique for the first time. Or, you can attempt more intricate designs like initials or wheat stalks if you’re feeling ambitious.
Scoring bread: a step-by-step guide
If your bread dough is proofed and ready for the oven, you’re ready to score your loaf. Use the step-by-step guide below to learn four steps for preparing your dough, choosing your scoring pattern, selecting a blade and bringing the pattern to life.
Yields
1 loaf
Ingredients
Fully prepared bread dough
Flour (optional)
Tools
Bread lame, razor blade, serrated knife or sharp kitchen scissors
Prep time
90 minutes
Bake time
25 minutes
Total time
1 hour 55 minutes
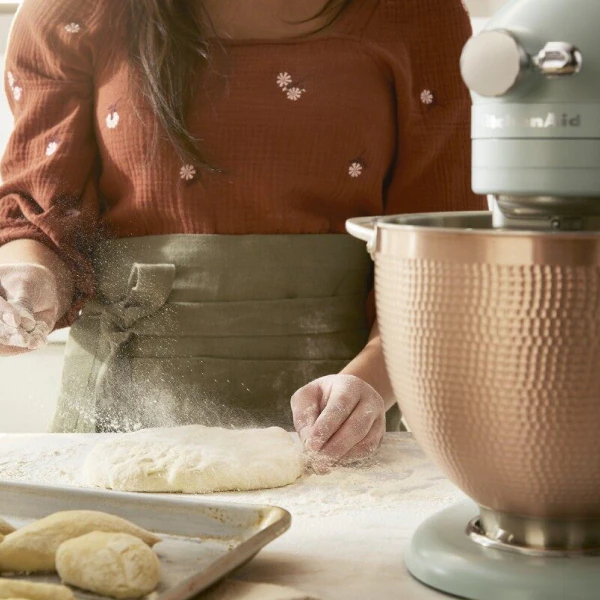
Step 1: Prepare and proof bread dough
Follow your bread recipe closely to prep the dough. Usually, this means giving the dough a light dusting of flour before the first proof, shaping it, then proofing it again if your recipe calls for it. Then, transfer your dough to its final destination before baking; whether it’s a floured baking container or a pan or tray lined with parchment paper.
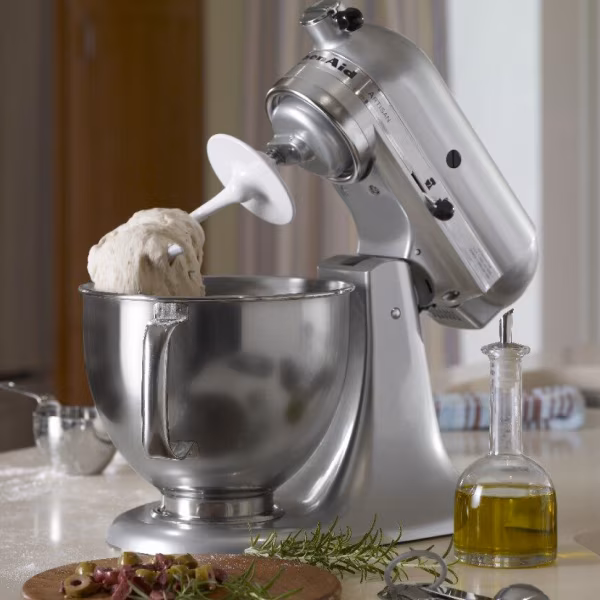
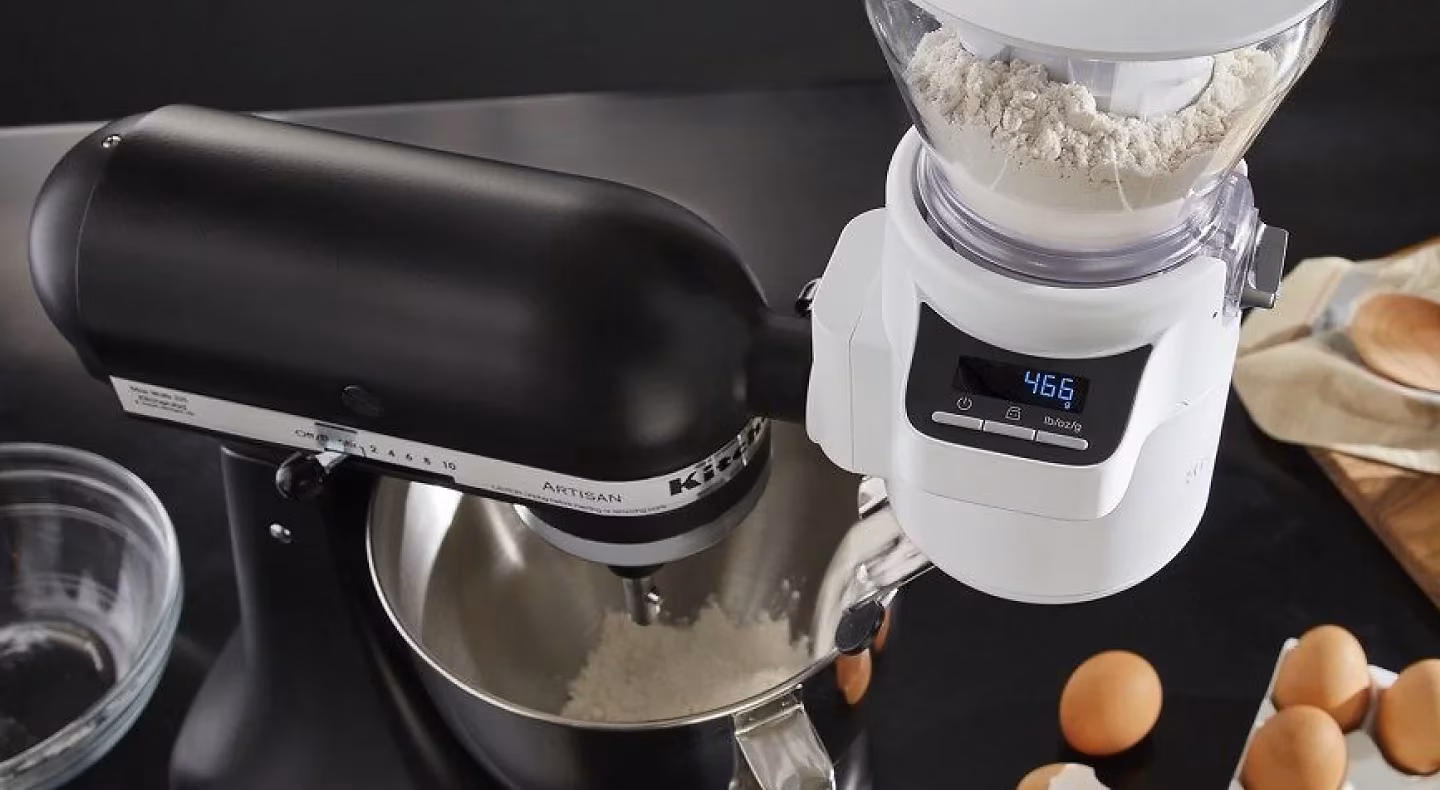
Consider preparing your dough with a KitchenAid® stand mixer and compatible bread-making accessories[1] to streamline the process. For instance, the dough hook gently kneads and mixes dough, and the KitchenAid® Bread Bowl with a Baking Lid lets you mix, knead, proof and bake all in the same bowl.
[1] Sold separately.
Step 2: Choose a scoring pattern
If you’re new to the scoring technique, it may be best to start with a straightforward pattern until you’re more confident. Give the hashtag pattern a try for a simple beginning. This pattern—along with cross or square-shaped scoring—best complements round loaves like boules. On the other hand, baguettes and batards often benefit from several small, diagonal cuts across the length of the loaf.
Step 3: Pick a blade
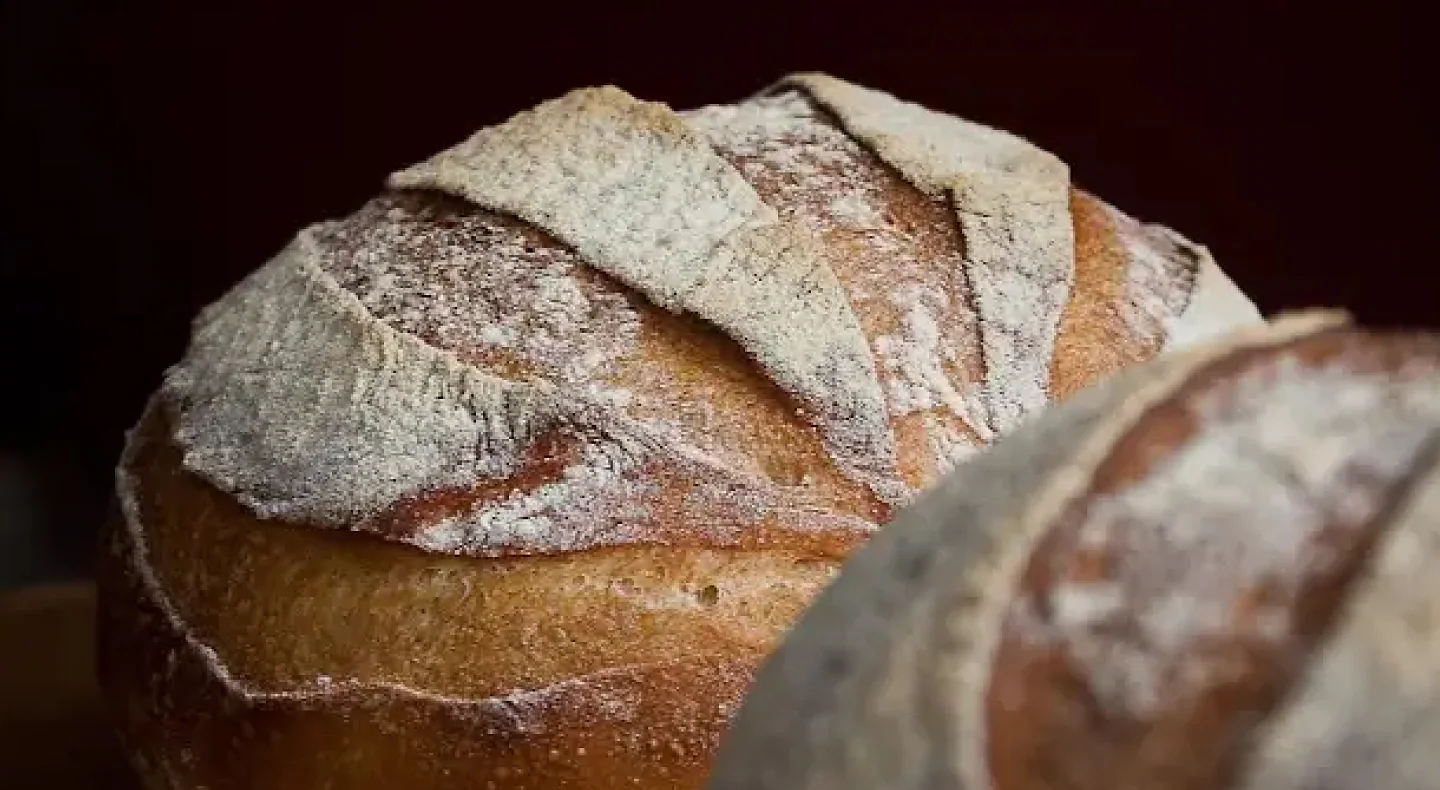
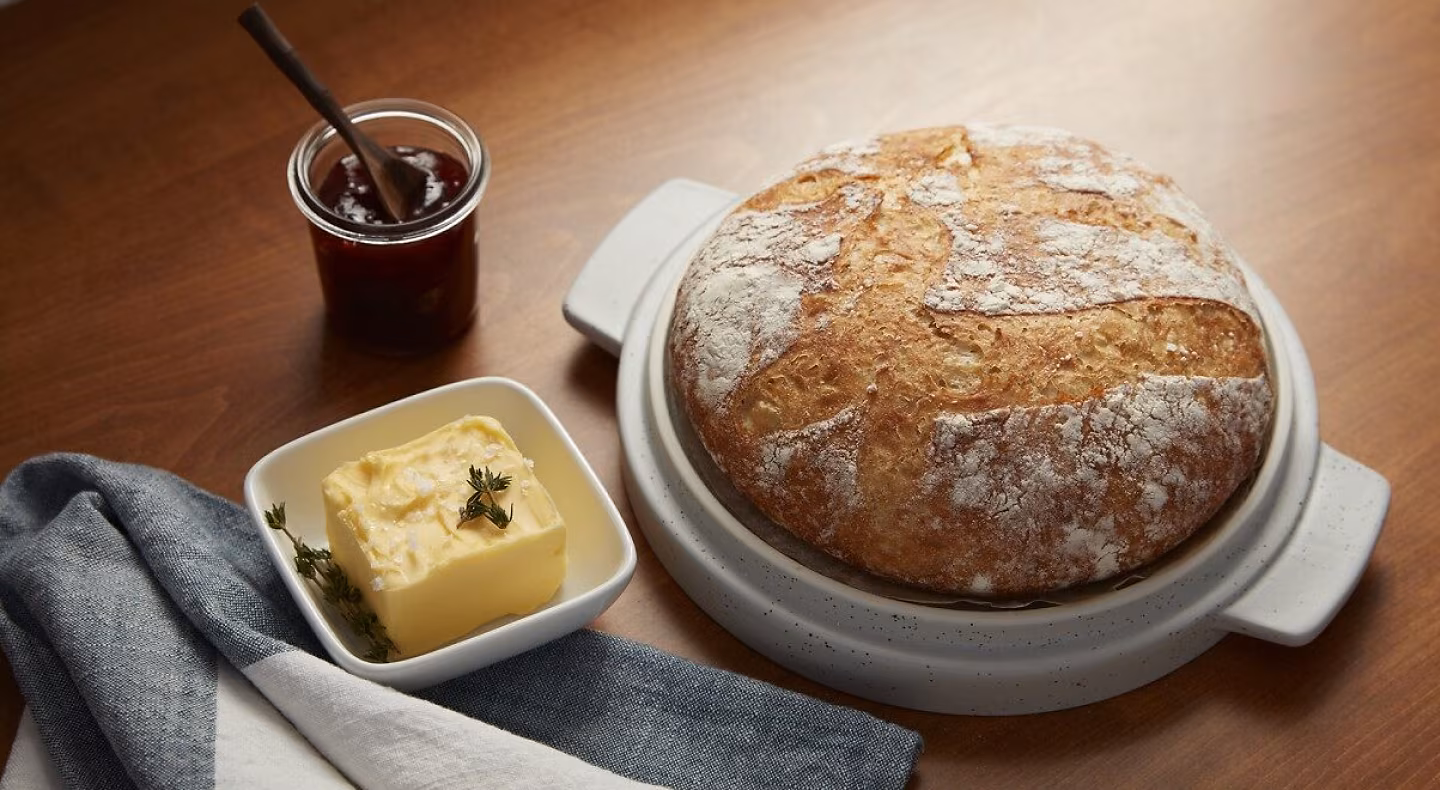
A handful of tools can help you create a stunningly scored loaf. A bread lame is a razor blade attached to a handle and is uniquely designed for scoring. Lames can come with curved or straight blades, but curved blades can be more helpful if you’re hoping to produce a pronounced ‘ear’ on the crust. When bread is scored and baked and the top flap lifts up and away from the bread, this is considered a "good ear," and is a sign of a well-made loaf.
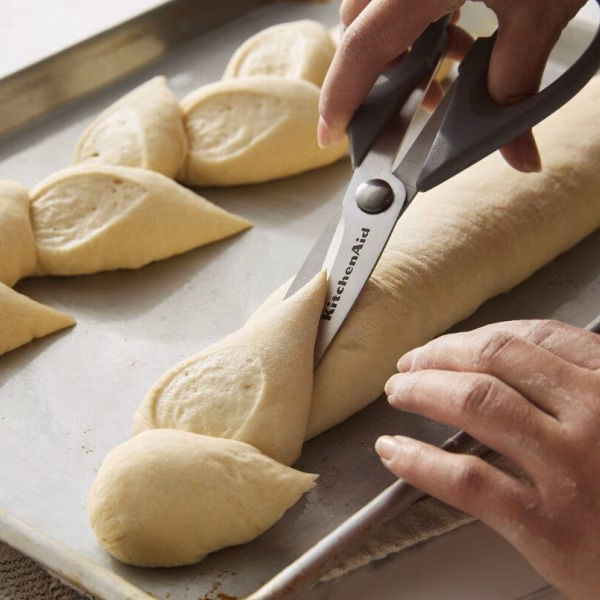
You can also use a double-edged razor (which tends to work better than single-edged options), sharp, clean kitchen scissors or a sharp, serrated knife. Scissors are particularly effective for achieving a mushroom-like top on brioche or penetrating dough adorned with nuts and seeds that may cause other blade types to snag.
Step 4: Make deep and swift cuts
Scoring bread for the first time can be nerve-wracking, but remember that hesitation can compromise the loaf’s shape and rise. Commit to swift, deliberate cuts that are at least 1/4" deep. Hold the blade at a 45- or 90-degree angle, depending on which works best for your chosen design, and be prepared to adjust the baking sheet’s position as necessary as you work your way around the loaf.
What should you use for scoring bread?
A bread lame is a tool uniquely designed to score bread and features a slender handle with an attached metal razor. However, you don’t need a bread lame to score effectively. You can also use a double-edged razor blade, sharp, clean kitchen scissors or sometimes a sharp, serrated knife to achieve your design.
How do you score bread with a knife?
Scoring with a knife should work in a pinch, but may not give you the same control that a bread lame or razor might. Make sure your knife is serrated, rather than straight-edged, and consider sticking to simple, straight cuts to help avoid compressing the dough too much.
Bread scoring tips
Scoring bread is an acquired skill, but the tips below can help you conquer it confidently as you experiment with this valuable bread-making technique:
Use a thin piece of string to lightly press down on the top of your dough and “trace” the cuts you plan to make. This can help you move quickly and confidently when it’s time to cut.
Pay careful attention to the proof. If you suspect the loaf may be over-proofed, it could be best to skip scoring altogether so you don’t risk the structural integrity of the loaf.
For intricate designs that may take some time to score, freeze the dough 30 minutes prior to help prevent the dough from deflating during the process.
To help prevent the blade from snagging on the dough, hold it lightly between your fingers but in a firmly locked hand.
Help prevent the blade from dragging by wiping off any stuck-on dough between cuts.
Cold dough is easier to score, so if you’re scoring for the first time, consider experimenting on a recipe that calls for a slow or overnight cold proof in the refrigerator.
Dust the top of the bread dough with flour before you score and bake it to create a more distinct contrast between the crust and design.
KitchenAid Chef
— Sharing our passion for making
At KitchenAid, we unite people who love cooking and baking, brewing and creating. For over 100 years, KitchenAid has worked on behalf of every Maker out there. Our iconic tools are made with you in mind — opening the door to new possibilities and helping you to get most out of making.